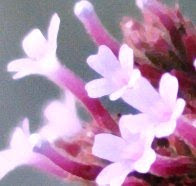
This is a cropped view of the entire image, perhaps showing a fifth of the total photo. Big win on the narrow depth of field and the quality of the image - this is pretty much what I was trying to do (woot!)
In processing I did the following:
- Adjusted the levels to better fit the histogram (nothing between 205 and 255, so just a little underexposed)
- Made an s-curve with the value, but didn't adjust the individual colors. The colors really popped out, but it seemed just a little cool overall
- I tried messing with individual colors to fix any white balance problem, but nothing really improved things. They were just, well, different
- Used the Warp Sharpen tool (see below of for more)
- Brightened a little more
Without further ado, here are the results:
 |
| The RAW image (cropped from original file) |
 |
| The Olympus JPEG (slightly different crop) |
 | ||
| Ta-da! Here's what I did in the digital darkroom. |
Here's the full photo, post processing
As I mentioned above, Warp Sharpen is a very cool plug-in. The one downside was that it made some of the fuzziness on the flower stalks seem polygonal, but the petals themselves really benefited. Here are before and after photos that lets you see the effect:
 |
| Before |
 |
| After |
The verdict? Mixed. I brightened this up a little at the end (post sharpening), but it's not quite there yet. The photo also lost a little of it's impact when I cropped it, as before it had a neat floating feeling. I'll mess around some more, but that's enough for this post.

No comments:
Post a Comment