Sunday, August 22, 2010

Lightroom

Yesterday I downloaded a 30-day trial copy of Adobe Lightroom 3. I jumped right in and started editing images and I was astounded to find that some complex tasks are trivial in Lightroom. I'm glad I started with Gimp, as it feels more hands-on and it's probably given me a better understanding of things like curves and layers, but there's really no comparison and I don't see any reason to go back (other than $$$ if I buy it for reals).

Notably, I like that Lr3 is both a library tool and an editing tool. Adding keywords and bulk adjusting photos makes sense, especially if I'm going to be taking a lot more photos in the years to come.

Here's a fun tool I played with - spot removal. This was a pic of Maya looking down at us from the balcony, but she had some serious eye goop going on. Well, that's not a problem! Sport removal works by selecting a small area and the letting you copy a different part of the image to that area. I would have thought that this would look lousy on anything other than a regular surface, but I used it on a border of fur and skin and had no problems. I used the spot removal tool at the same time I edited white balance and exposure, and here's the result (look at the left eye):
Original processed JPEG (from camera)
Processed w/Lightroom and using the spot removal tool

Exercise 3 - Applying a Process

My daughter Leah came home from the hospital on 8/14, and what better moment/subject for a portrait? This photo is her lying on the bed sound asleep and it's something I want to remember forever, so I'm motivated to make sometime worth hanging on the wall. There were several similar images, but I picked this out out because the focus was right on her eyes, it is well-framed, and the DOF seems just right (at larger apertures her hand is out of focus). Actually, the JPEG from my camera looks great already, but I want to see if I can make something stunning.

Photo data:
--Olympus PEN E-PL1 w/Panasonic 200mm pancake lens
--F/2.8, 1/15.0 sec, ISO 1600, auto WB, no flash
--Light from window behind camera with southern exposure, mid afternoon sun


Initial image from as JPEG
Just glancing at this I have a few concerns that I'll want to see if I can fix in processing
--It's a bit grainy from the ISO
--The shadows on the left side make this look like pin-hole photo
--Very little color


The Process (i.e. my plan)
(1)  Crop and correct orientation
(2)  Exposure
(3)  White balance
(4)  Input/Capture sharpen
(5)  Denoise
(6)  Vibrance and saturation
(7)  Switch to RGB
(8)  Dodge and burn
(9)  Fix distortion
(10) Output sharpen
(11) Output as JPEG

Well, not all of these applied - the crop was pretty good, I didn't input sharpen, and dodging and burning in Gimp is non-trivial for an otherwise good picture. Still, I followed this pretty closely and here's what came out:
A keeper

Saturday, August 07, 2010

Exercise 2 - Purple Flower

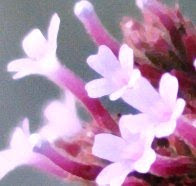
I bit off a bunch of things with this photo. It was taken with a 20mm lens at ISO 100 and F1.7 in late afternoon light. I used auto-WB, which seems to have worked okay, and I was delighted with the image stabilization allowing me to shoot at 1/15-sec shutter speed w/o a tripod.

This is a cropped view of the entire image, perhaps showing a fifth of the total photo. Big win on the narrow depth of field and the quality of the image - this is pretty much what I was trying to do (woot!)

In processing I did the following:
  • Adjusted the levels to better fit the histogram (nothing between 205 and 255, so just a little underexposed)
  • Made an s-curve with the value, but didn't adjust the individual colors. The colors really popped out, but it seemed just a little cool overall
  • I tried messing with individual colors to fix any white balance problem, but nothing really improved things. They were just, well, different
  • Used the Warp Sharpen tool (see below of for more)
  • Brightened a little more

Without further ado, here are the results:
The RAW image (cropped from original file)
The Olympus JPEG (slightly different crop)
Ta-da! Here's what I did in the digital darkroom.

Here's the full photo, post processing


As I mentioned above, Warp Sharpen is a very cool plug-in. The one downside was that it made some of the fuzziness on the flower stalks seem polygonal, but the petals themselves really benefited. Here are before and after photos that lets you see the effect:
Before
After

The verdict? Mixed. I brightened this up a little at the end (post sharpening), but it's not quite there yet. The photo also lost a little of it's impact when I cropped it, as before it had a neat floating feeling. I'll mess around some more, but that's enough for this post.

Friday, August 06, 2010

Exercise 1.1

I took another pass at fixing this image. This time I did the following in GIMP:
 (1) Fixed white balance using curves
 (2) Used the value curve and pulled the right point to the left a bit
 (3) Increased color saturation
 (4) Adjusted levels to better match the histogram
 (5) Used the Warp sharpening plug-in script (default values)

Here's the result. I think it's much better (and better than the Olympus JPEG!), but I've definitely lost contrast on between the dark fur and the shadows of the table. Gotta figure out how to bring that back.

Pretty good!

Wednesday, August 04, 2010

Exercise 1

I took a deliberately bad picture of the mighty Nola cat in the 6:00 AM light. I had the white tile to let me color balance, so this was an attempt to see how I could do using GIMP, benchmarked by the Olympus automatic processing.

I used a technique for removing a color cast, where I find three parts of the image that are white (paw, floor, shadow on floor) that have different amounts of light. White should be equal red, green and blue, so I raised the blue and lowered the red to match the green on each spot using a curve.


Here's the original RAW file (as JPEG but with no cleanup)

 My fix (using GIMP, normalizing RGB on three points)...


Olympus wins this round. I think it cheated, but I can learn from cheaters.
When you get down to it, though, the color on my edit is more true, but I haven't brought up the contrast or brightened the colors. It makes me think that if I can add a few other tricks to the bag that I'll be able to rock the digital darkroom.

Full credit to the lesson I found at Grokking the GIMP

I have made a blog

I'm cool now.